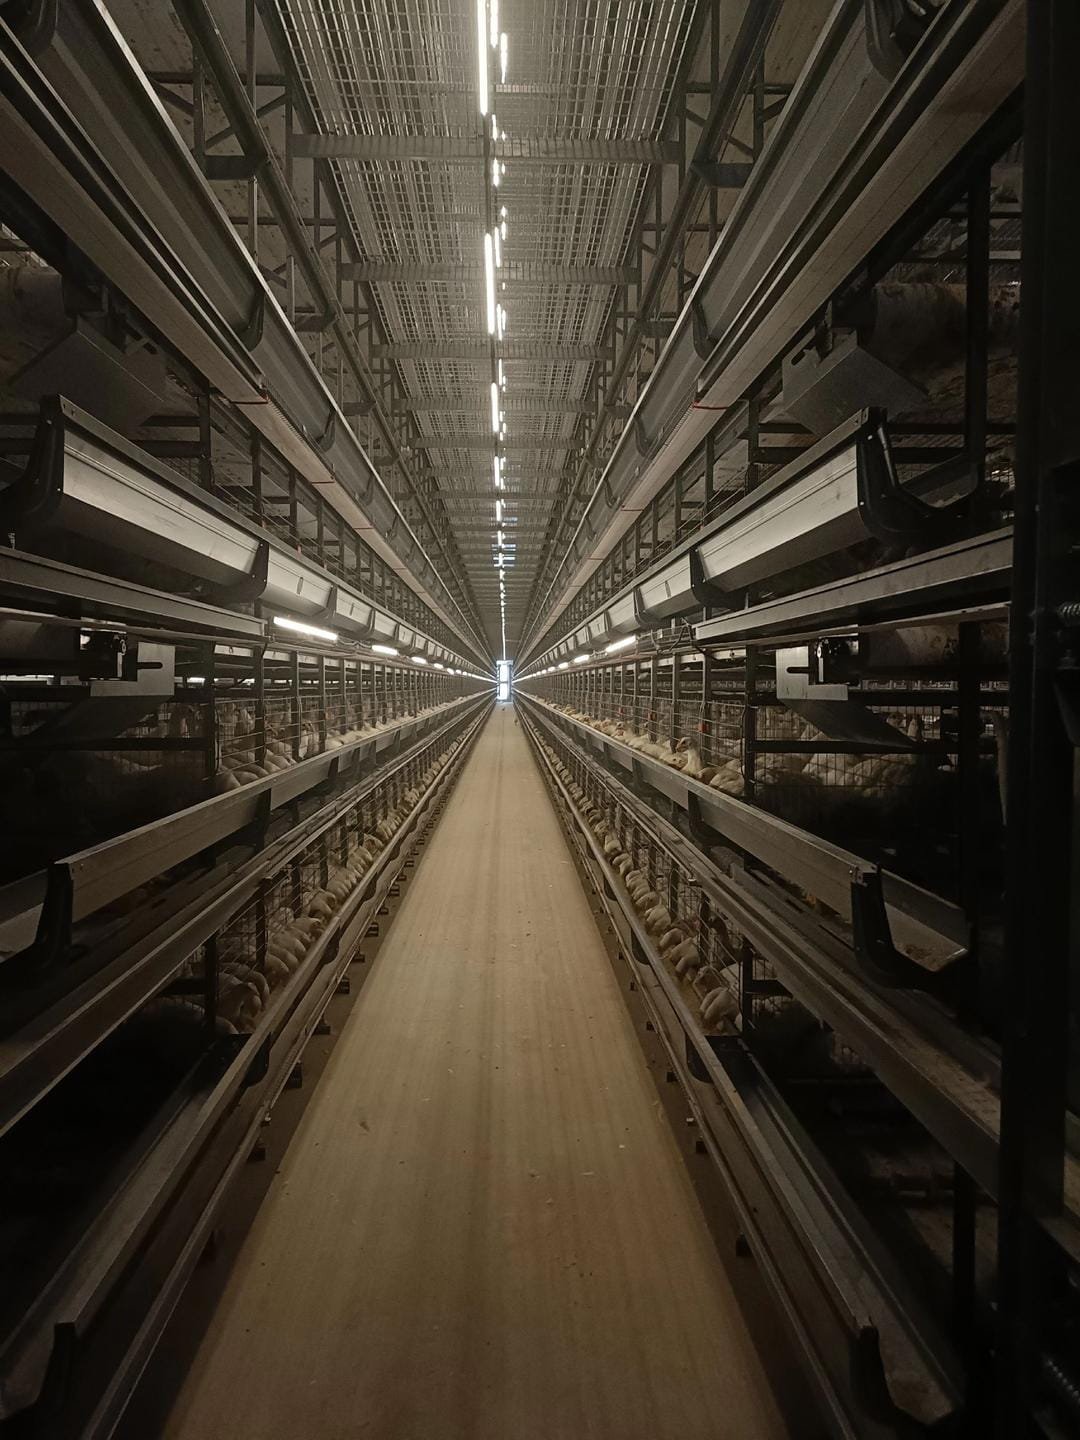

Management of Broiler Cage System
A Comprehensive Guide to Broiler Management: From Day 1 to Finish
The Critical First Day
We all know that the final body weight of a flock is positively correlated with its 7-day body weight. In my opinion, apart from the chick’s initial weight, the most critical factor determining the 7-day weight is the management on the first day. You could even say: The first day is crucial for the entire life of the chicken.
1. Temperature Management
After the chicks arrive, the house temperature must be adjusted upwards promptly based on their behavior. The first thing chicks do is drink water, and after drinking, some often start huddling together. Adjust the temperature immediately to let them adapt slowly.
- Remember this, everyone: If the chicks are huddling, it means our temperature (or, more precisely, the chicks’ perceived temperature, which might be low because we haven’t increased the humidity enough) is still not sufficient. Keep heating (or humidifying) until the chicks are resting together quite loosely (not as spread out as older chickens), which means the temperature is right.
- Consequence of Failure: If the first-day temperature isn’t met, the chicks will be cold, inactive, and won’t eat or drink. This directly impacts the 24-hour satiety rate, which in turn affects chick uniformity and the 7-day weight.
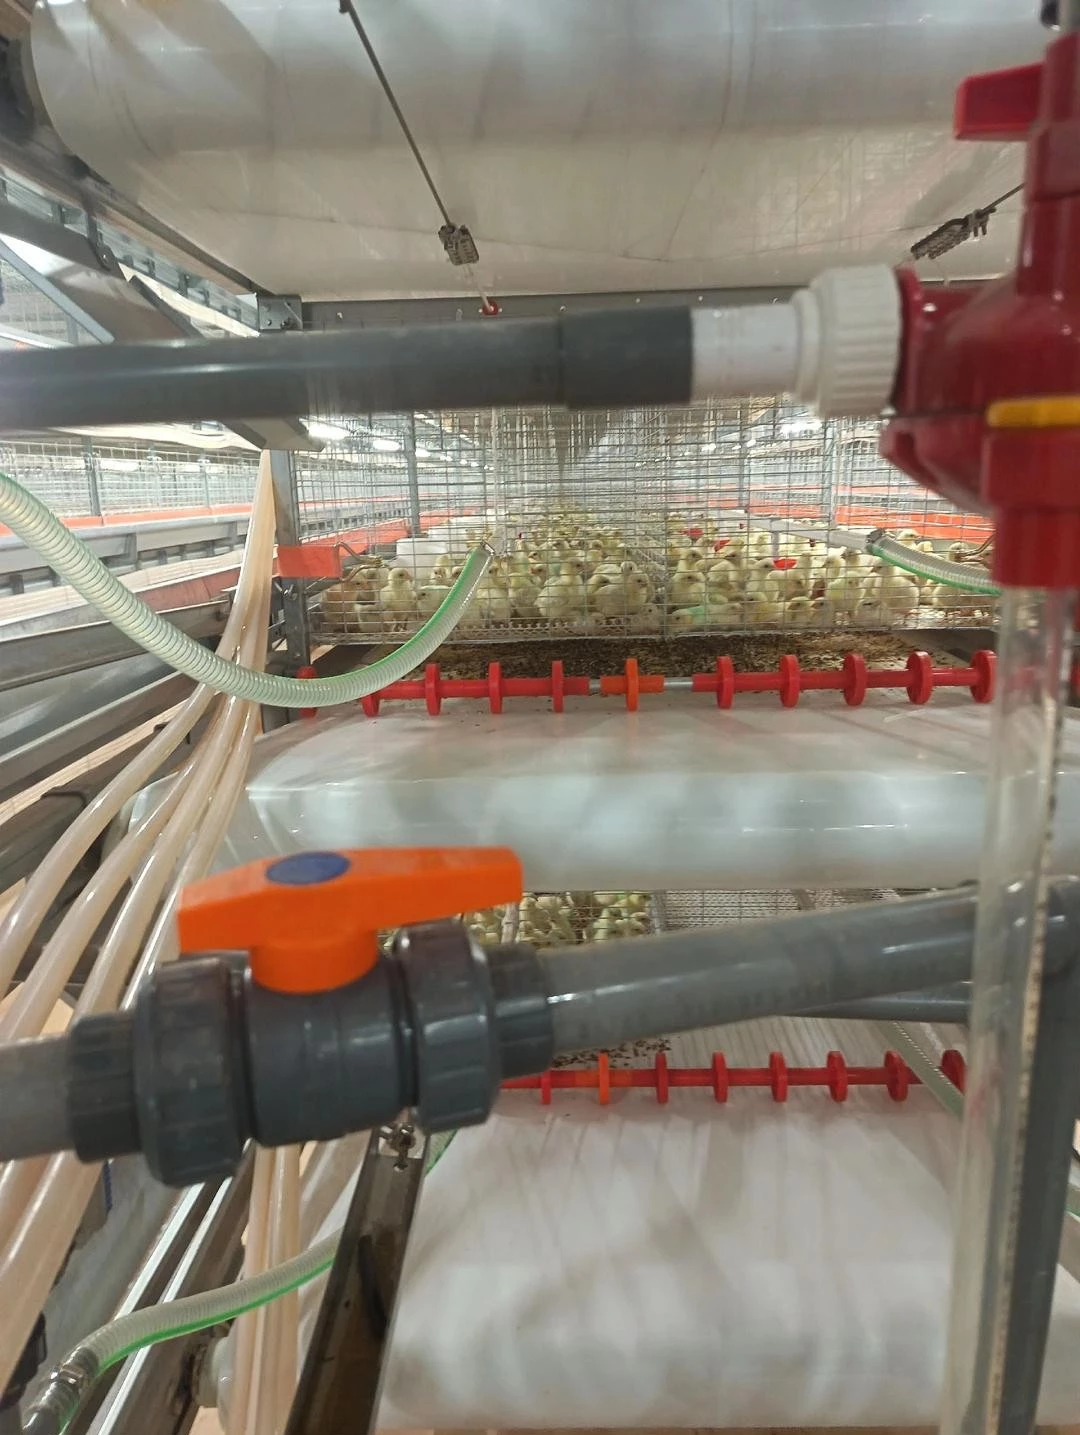
2. Water Lines

- Height: Adjust the drinker cups so the base is about one to one-and-a-half finger widths above the floor. This creates a 45-degree angle for the chick’s neck when drinking, meeting their needs.
- Inspection: After the chicks start drinking, use a flashlight to check each nipple. Droplets in the cup indicate proper function; a dry cup signals a problem.
- Critical Note for Cages: In cage systems, we must double our attention to the water lines. In net or floor systems, if one nipple is blocked, the bird can go to another; if one line is blocked, they can go to another line. But in cages, if the nipple in a cage is blocked, the chicks in that specific cage will suffer from water shortage.
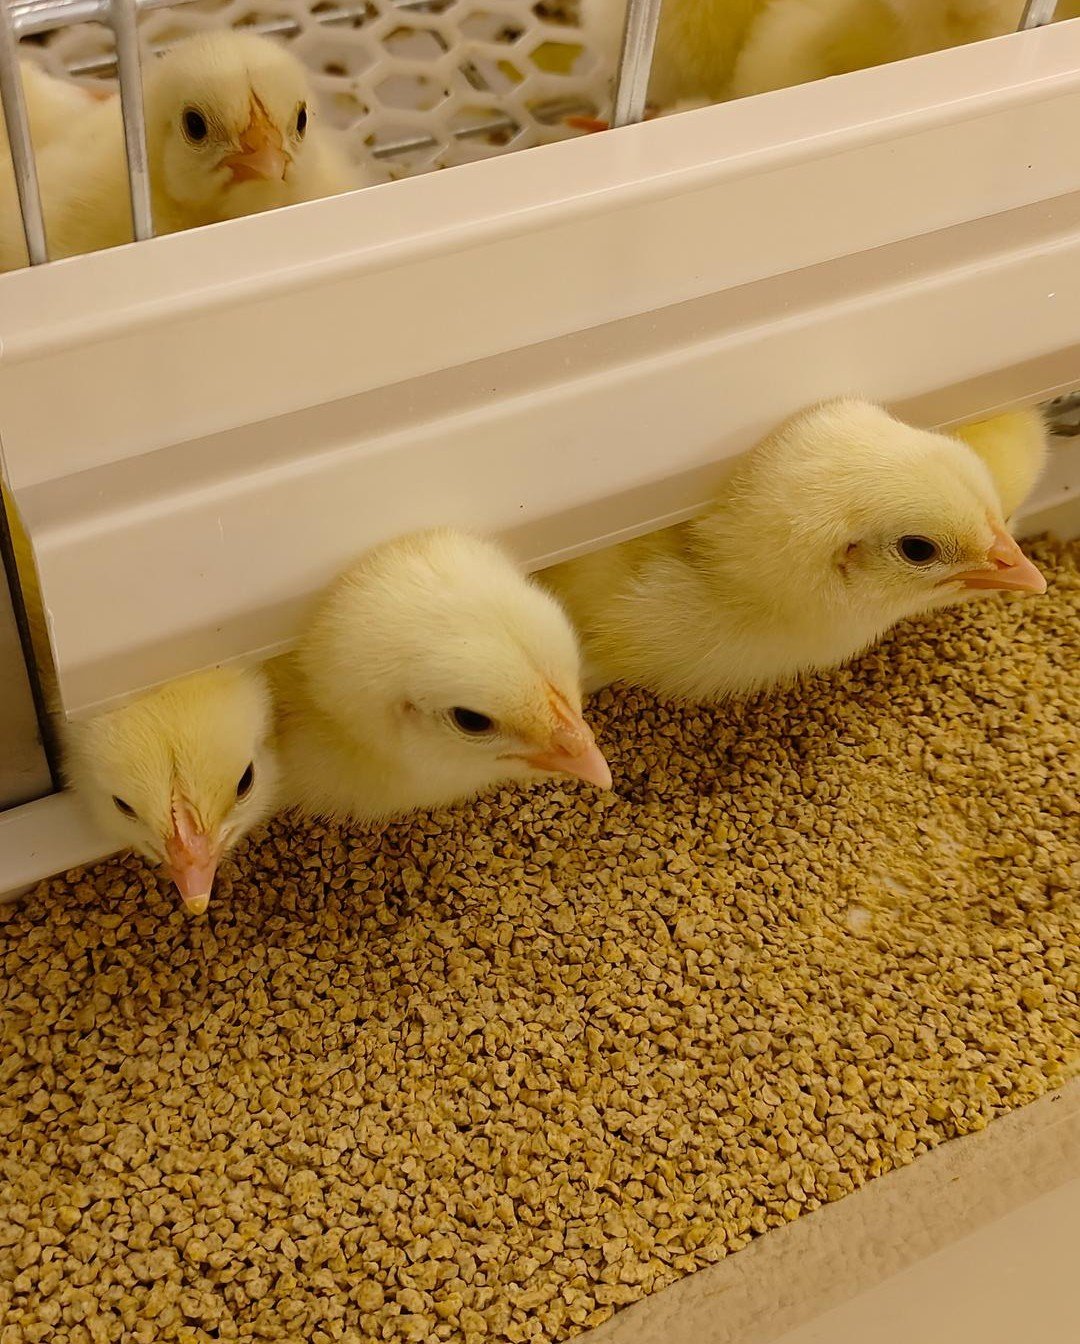
3. Feeding Management

- Methods: You can use small feeder trays to assist starting, or start directly with the troughs. If using trays, they should be removed after about 3 days to transition to the troughs. Using them for too long increases labor and can make the chicks dependent on the trays.
- Technique: For trough feeding, you can make the initial feed layer thicker to attract chicks and make it easier for them to eat. If you’re worried the chicks are too weak, using trays is still recommended.
- Monitoring: Regularly check if the feed reduction in the trays/troughs is normal. If you find it’s not decreasing properly, it indicates a problem elsewhere, like with the water lines or temperature. The 24-hour satiety rate should be over 99%, meaning basically all chicks have drunk and eaten.

4. The Problem of “Chicks Getting Wet”
If individual chicks get wet (due to long transport time or incorrect temperature adjustment), you should immediately disperse them from under the drinkers to prevent them from continuing to huddle there. For severely wet chicks, put them in a cardboard box and place them near a heater to dry their feathers before returning them to the cage.

5. Trough Adjustment and Escapees
When starting with troughs, adjust the feed retaining plate to a gap of about 2cm. promptly return any chicks that escape from the cage to prevent dehydration.

6. Preparation and Vigilance
The first day requires meticulous work arrangements and being prepared to stay up late. Don’t let fatigue lead to water/feed shortages or the boiler going out. Keep spare parts for easily damaged hardware – like circulation pumps, temperature probes, and environmental controller motherboards – at least one full set per farm for emergencies.
Management from Day 2 to Day 6
Once the chicks have had their first drink and bite of feed, they develop a conditioned reflex, so we don’t need to worry about them not knowing how to eat and drink anymore. For the first 10 days, we generally provide feed continuously – don’t restrict it. During days 2-6, the chicks will experience their first ventilation and a drop in indoor humidity. In my opinion, the first ventilation is still a challenge for them, so let’s talk about that first.
1. First Ventilation

- Timing:
- Closed Houses, Spring/Autumn: We usually start the first ventilation on the third day.
- Winter: Depends on the indoor environment and outside temperature.
- Summer/Rainy Season: Adjust based on indoor humidity. If the humidity stays above 75% for a long time, consider ventilating earlier. Otherwise, moisture in the droppings won’t evaporate in time, soaking the chicks’ feathers and making them stick to their bodies, while also increasing the risk of high perceived temperature.
- Volume: The first ventilation is just a rehearsal to get the chicks used to air movement. You can use mechanical ventilation or open small windows for natural airflow. For example, in a cage house with 20,000 birds, on the first day of ventilation, you could set a 1.4m fan to run for 5 seconds every 300 seconds, or a 1m fan for 10 seconds every 300 seconds. Here, we must consider the drop in perceived temperature. If the humidity in the house drops by more than 20%, you should reduce the ventilation volume (e.g., at 32°C, a 20% humidity drop feels about 3°C cooler).
If you have a single house, the owner can adjust the ventilation freely based on how the environment feels. We’ll discuss ventilation volume separately later.

2. Transition from Trays to Troughs
- When first using the troughs, appropriately increase the feed thickness and use your hand to sweep the feed towards the side where the chicks are, making it easy for them to eat.
- Once you start using the troughs, remove the empty feeder trays. Otherwise, some chicks, reliant on the trays, won’t learn to find food in the troughs.
- Regularly sweep leftover feed towards the edges of the troughs, training the chicks from a young age to eat the feed surface.

3. Water Lines
- By the third day, start adjusting the water line height based on the chicks’ height, and continue doing so every 2 days. Before 10 days, the drinking height shouldn’t be too high; a 45-degree neck angle is fine.
- Flush the water lines once on day 6, and then after every course of medication that causes loose droppings. Don’t be lazy with management – blocked water lines are a real headache.

4. Weak or Disabled Chicks
Promptly pick out and cull weak or disabled chicks. Don’t let them infect other healthy birds in the flock.
5. Temperature
Reduce the temperature by about 0.7°C per day, maintaining it around 30.5°C by day 6. Don’t be reluctant to lower the temperature. Excessively high temperatures will affect feed intake, leading to failure in meeting the 7-day weight target.
Day 7 Vaccination and Grading Management
1. Vaccination Stress
Vaccination (injections + eye/nose drops) on day 7 is a significant stressor for the flock. If we rate stress on a scale of 1 to 5 (my personal view), vaccination would be a level 4.
| Stress Level | Description of Stressors |
|---|---|
| Level 1 | Sudden loud noises, scheduled feed restriction, rain or snow, etc. |
| Level 2 | First experience of darkness, normal water withdrawal for vaccination, construction work inside the house, etc. |
| Level 3 | Water outage for over 2 hours, short-term temperature fluctuation exceeding 1°C, stuffy/ poorly ventilated house feeling, etc. |
| Level 4 | Drastic external temperature drop, vaccination, flock movement/ sorting, short-term temperature fluctuation exceeding 2°C, etc. |
| Level 5 | Incorrect cooling pad operation, mechanical failure leading to a temperature drop over 3°C, heat stroke, etc. |
Therefore, from day 6 to 8, provide vitamins in the water to reduce stress, and on day 7, raise the target house temperature by 1°C. The various methods of vaccination are common knowledge, so I won’t elaborate further.
2. Grading (Sorting by size)
- If vaccinating in the warm season, you can grade the chicks at the same time. It’s advisable to separate them into the middle and upper tiers only. Some distinctive farmers separate all three tiers at once on day 7. While this is beneficial for space and avoids the stress of a second grading, even in summer, the temperature difference between the lower and middle tiers can often exceed 2°C. If we can’t balance the temperature in the lower tier, it’s better to put in a bit more effort and delay moving them down.
- Grading Time:
- Summer: First grading can be on day 7; the second grading shouldn’t be later than day 18.
- Spring, Autumn, Winter: The first grading is usually between days 10-14; the second grading between days 19-25. The timing varies with the sophistication of the equipment.
- Bird Count per Cage after First Grading: Two methods, each with pros and cons:
- Method 1: Move half the birds to the upper (or middle) tier. This method keeps the density the same, resulting in better flock uniformity. The downside is that the second grading is more laborious.
- Method 2: Move one-third to the upper tier and two-thirds to the middle tier. The advantage is that the second grading is easier. The disadvantage is that the tier with higher density will have smaller birds and poorer uniformity.
Our past experiments showed that the “one-third upper, two-thirds middle” method can cause significant weight differences after 19 days, with average differences in some control groups exceeding 31 grams.
3. Points for Attention in Water Line Vaccination for Caged Birds
If you choose water vaccination for Newcastle Disease/Infectious Bronchitis on day 7, note these two points:

- For water lines with a slope and a PVC drain pipe at the end, drain the line from the end when starting water restriction to ensure the flock has the same level of thirst.
- When starting to introduce the vaccine, close all the water line valves. Start filling from the farthest end from the water inlet, opening valves progressively towards the source. Within a row, open the upper tiers first, then the middle, then the lower tiers, ensuring each tier gets water. This helps guarantee that all birds contact the vaccine in the shortest possible time.
Turning off the house lights until the vaccine fills the lines before turning them back on is also a good method, but be careful to bleed air from the lines.
Days 8-12: Management of the First “Purification Period” and Key Medication Points
As we all know, after vaccination, broilers enter an immune “window period” where antibodies against diseases like Newcastle Disease and Infectious Bronchitis are low. The risk of Mycoplasma Gallisepticum (MG) infection increases. Furthermore, changes in lighting and feeding methods create stress. Therefore, I believe the management and medication from days 8 to 12 are crucial. Let’s discuss them point by point.
1. Days 8-12 are a critical window for Mycoplasma purification. I call this the “First Purification Period.”
- Mycoplasma (MG): Sampling from some parent-breeder farms in China by a laboratory showed a positive rate exceeding 10% for Mycoplasma Gallisepticum (MG). MG can be vertically transmitted to commercial broilers. Day 7 vaccination can compromise the integrity of the respiratory tract’s epithelial cells, which is a key reason why some flocks develop serious respiratory issues post-vaccination. E. coli can also collaborate with Mycoplasma, accelerating its spread.
- In my opinion, Days 8-12 are a critical node for purifying Mycoplasma. Proper medication during this period can significantly reduce the incidence of later respiratory diseases like airsacculitis.
2. Preventing Gizzard Erosion is crucial and affects the bird’s entire life.
This needs constant vigilance.
3. Regarding feed control in cage systems:

Many experienced farmers who previously raised chickens on floors or netting find it difficult to control feed in cages. It’s hard to adjust the feed spreader on the trolley daily, and you can’t just stop halfway through a feeding run. So, controlling feed intake is challenging, and this aspect is often neglected in cage management.
The benefits of feed control are well-known. The common practice now is: let the birds eat for about two-thirds of the time until only a small amount of powder remains, then restrict feed for one-third of the time. For example, if it takes 4 hours to consume the available feed, then restrict feed for 2 hours.
I reiterate: Restricting lighting does not affect feed intake. So, using prolonged dark periods to control feed is wrong.
4. Lighting:
Respecting natural rhythms is always beneficial. A dark period can help prevent Flip-Over Syndrome (Sudden Death Syndrome) and reduce mortality. If the dark period exceeds two hours, you can split it with a break.
| Age Period | Lighting Duration (Hours) | Illuminance |
|---|---|---|
| Day 1-10 | 24 | 30-50 LUX |
| Day 10-30 | 20-23 | 5-10 LUX |
| Day 30 to Market | 24 | 5-10 LUX |
5. Humidity:
As ventilation increases daily, maintaining 50% humidity becomes increasingly difficult in spring, autumn, and winter. The easiest and fastest method is still sprinkling water on the floor. This increases humidity and helps adsorb the down feathers chicks start to shed, freshening the air.
Days 12-20: Management During the Initial Feather Loss Period & the Second Purification Period
1. Temperature and Ventilation during this stage:
Well-nourished flocks typically start losing their downy feathers around 12-14 days. If this is delayed, it indicates insufficient weight or malnutrition. Don’t reduce the temperature too quickly; aim for about 0.25°C per day. Adjust ventilation based on the indoor environment and the external conditions. For example, during strong wind or cooling events, increase ventilation less or not at all. During sharp temperature drops, we might even reduce ventilation.
I told a farm owner who often asked about ventilation parameters: “Adjust based on what you see when inspecting the house – is it stuffy? What’s the temperature? How do the birds look? What’s the humidity? Is the wind speed too fast? First, you can’t set a parameter in the morning and leave it all day. Second, don’t be too dogmatic.” Please believe me, you can’t raise chickens well by strictly following textbooks or manuals. Given the current level of technology, raising chickens is like practicing “Mizong Quan” (a style of kung fu) – you adapt to the situation as it unfolds.

2. Infectious Bursal Disease (Gumboro) Vaccination:
In recent years, typical Infectious Bursal Disease hasn’t been widespread. In some areas (e.g., Eastern Shandong), they haven’t vaccinated for it for 4-5 years. Furthermore, many companies now produce oil-based vaccines that include IBD, allowing vaccination at day 7 without needing a separate IBD vaccine at day 14, reducing the risk of vaccine-induced respiratory issues. I won’t elaborate further here.
3. The Second Purification Period:
If we didn’t control the respiratory reaction during the first purification period, and over 10% of the flock still shows symptoms like sneezing or coughing, we must conduct a second purification.

If respiratory issues persist beyond 20 days, we need to check if our management is the problem:
- Poor air quality in the house, high ammonia levels (accounts for only about 5% of cases).
- Excessive ventilation, causing some birds to catch a chill (accounts for about 90% of cases).
- Excessively low humidity (accounts for about 60% of cases, can overlap with point 2).
4. Points to note when switching from small to large exhaust fans:
- When replacing small fans with large ones, you can initially cover half of the large fan’s opening, gradually reducing the cover to one-third. Don’t rush this. Generally, about 2.3 units of 1.1m small fans are equivalent to one 1.4m large fan; about 3.3 units of 1m small fans equal one 1.4m large fan.
- Pay attention to negative pressure.
- After switching, temperature fluctuations often occur at the front and back of the house. Observe closely and adjust inlet window sizes accordingly.
Personal Opinion: I believe the most critical 10 days for broiler farming are between 21 and 30 days of age. Other periods might determine how well you do, but these 10 days determine your success or failure. Some might disagree, saying: “My problems always start around day 35… that’s when respiratory issues flare up, viruses hit, birds die, and feed intake stalls or drops.”
We often say “ice three feet thick is not formed in one day.” Flocks that have problems around day 35 often had the root cause planted between days 20 and 30. The pathogens for many viral diseases are already present in the air. If our management is sound and the birds’ antibody levels are normal, the virus won’t find an opportunity. Conversely, if management is constantly problematic with wide temperature fluctuations and constant stress, the birds will be in a sub-healthy state, and disease will find them.
Look at the images below [Note: Referenced images not shown]. The flock might seem normal, but did we notice the sub-healthy signs? Crooked combs?

Deformed eyes or even foam?

If these sub-healthy signs appear between 20-30 days, the flock will often have problems around day 35. These issues are generally caused by one of two things: Excessive ventilation or excessive temperature variation.
Days 21-25: What to Pay Attention To
1. Key Points for Grading (Sorting/Separating the flock)
- Timing: In spring, autumn, and winter, grading is usually later than in summer. The second grading in summer is often completed before day 15, while in the other three seasons it’s usually after day 18. During the coldest periods with cold snaps, it might even be delayed until after day 22. Of course, if the temperature difference between the middle and lower tiers can be kept below 1°C, the earlier the grading, the better, as it reduces spatial stress and improves uniformity. However, if the temperature difference exceeds 2°C, we should delay grading appropriately.
- Post-Grading Protection: After grading, the front and back of the cages should be shielded to prevent drafts from hitting the birds.
- Bird Count: It’s crucial to get the number of birds per cage right during this grading. In cold weather, you can put one or two extra birds in the very first and last cages.
- Temperature: For two days after grading in cold seasons, you can either not lower the temperature or even increase it by 1°C.
2. Ventilation and Temperature Reduction
- Ventilation: Except during hot weather, my approach to ventilation during days 21-25 is still to be conservative. Don’t try to make the indoor environment match the outdoors. This increases the risk of chilling the birds and raises heating costs.
- Temperature: Reduce the temperature by about 0.25°C per day.
3. Feed Change Stress and Gut Health
In cage systems, just like in net systems, birds have little contact with manure, so there’s no need to add coccidiostats around day 10 (unless used in combination for gizzard erosion syndrome). The change from starter crumble to grower pellets around day 20 is a test for the birds’ feeding habits and gut health. During the feed change, you’ll notice birds digging pits in the feeder to find fine particles, and feed wastage in the aisles and on the manure belt often increases – these are signs of digestive tract issues. Gut health management becomes very necessary at this stage.
Part 7: Days 26-30: The Final Five Days of the Most Critical Ten-Day Period
I often say that if our flock is still healthy by day 30, we are 99% successful. This is just a figure of speech, but it highlights why I emphasize management from day 20 to 30 – these are the most critical ten days in broiler farming. What should we focus on in the last five days of this critical period?
1. Temperature reduction should accelerate.
After day 25, broilers’ absolute weight gain accelerates, metabolism is more vigorous, and their body weight is relatively larger. High temperatures at this stage will affect feed intake. During these five days, we should lower the temperature by about 0.3°C daily. By day 30, aim to have the temperature around 25-25.5°C.
2. Ventilation
Before day 30, my ventilation habits tend to be biased towards conservatism because our primary task in the first 30 days is to ensure flock health. After day 30, the primary task shifts to maximizing growth. So, during this stage, ventilation only needs to ensure oxygen supply and air exchange.
3. Regarding Feed Control
Days 26-30 are the period of most vigorous feed intake! Many farmers can’t bear to see their birds hungry and fighting for feed, so they stop controlling feed and pile it on. I once saw a farm where the flock was “over-fed” by 5 days at day 30 (meaning they ate a 35-day ration by day 30). The result was an outbreak of non-classical Newcastle Disease around day 32, and until slaughter at 40 days, the birds never ate that much feed again. This kind of management is “spoiling” the birds and is extremely detrimental. To raise chickens well, you have to be ruthless when necessary.
- Feed Intake: For birds aged 26-30 days, being “over-fed” by one day’s ration is acceptable, but not more.

4. Humidity
During spring, autumn, and winter (like right now in October), maintaining humidity above 50% after day 25 is very difficult (except for floor-reared systems). Keeping the ground moist is the most convenient way to add humidity.

5. Medication
It is necessary to add a course of medication for airsacculitis between days 27-30. This medication helps ensure respiratory health around day 30 and can reduce mortality after day 35 caused by pulmonary necrosis.
The “Finishing Work” After Day 30
If your flock reaches day 30 with normal respiratory signs and normal feed intake, congratulations, you are 90% successful. What key management points should we pay attention to in the last 10 days to ensure a victory with high body weight and a low feed conversion ratio (FCR)?
1. Lower the temperature, lower it, lower it!
When I visit farms, I often see two strange phenomena simultaneously after day 30: first, the house temperature won’t go down, and second, feed intake won’t go up, even though the flock looks normal. This puzzles the owners. Actually, these two are related. Experiments show that after day 30, especially after day 35, a house temperature above 26°C significantly impacts feed intake. However, many owners, accustomed to the heat preservation management of the first 30 days, develop inertia. They get scared when lowering the temperature – is it too low? Is the ventilation too high? Will it chill the birds?
- From 30-35 days: We must insist on lowering the temperature by 0.3°C daily.
- After 35 days: Lower the temperature by 0.5°C daily. By around day 40, it should be lowered to 19-21°C. Grit your teeth and get the temperature down, and the feed intake will naturally increase.

2. Persist with feed control until day 35, then allow unrestricted feeding.
As mentioned before, we must persist with feed control until day 35. Suddenly allowing unrestricted feeding before then will increase the burden on the intestines and internal organs, affecting “frame development” and potentially triggering non-classical Newcastle Disease.
3. Focus on Gut Health.
Frankly, in many chicken farms, the feed wasted due to intestinal problems after day 30 is more than what the flock eats in a single day when they are young. Poor feed conversion after day 30 is a major reason for a high final FCR.
- Solution: Use a coccidiostat + intestinal anti-inflammatory drug around days 33-35 to adjust the gut.
4. Clean the Water Lines Promptly!
After more than 30 days of use, due to medication carriers, algae growth, etc., many water line nipples become “slightly blocked.” When the water output of a nipple falls below 40 ml/minute, it affects broiler feed intake. This refers to a single nipple. After day 35, broilers become lazier. If they can’t get enough water from one nipple, they won’t immediately go to another one in the short term, which affects feed conversion.
- Solution: Flush the water lines after each course of medication. Using an organic acid in the water for 6-7 hours every three nights is very effective for cleaning the nipples.