
Essential Broiler Management Handbook for Every Operator in Large-Scale Poultry Farming
The Essential Broiler Management Handbook serves as a comprehensive operational guide for every technician and manager engaged in large-scale poultry farming. It systematically addresses critical aspects of modern poultry farming, including environmental control (ventilation/temperature), feeding strategies, water management, biosecurity protocols, and disease prevention. By standardizing procedures across farms, the handbook aims to optimize flock health, improve feed conversion ratios, and maximize productivity in high-density poultry farming operations. Its data-driven frameworks help operators mitigate risks while enhancing animal welfare and economic returns—making it an indispensable tool for achieving excellence in industrial poultry farming.
I. Rearing System and Methods
1. “All-in All-out System”
A farm introduces a batch of chicks of the same breed, same day-age, and from the same source at the same time. When reared to a certain body weight, these birds are marketed together. This system facilitates thorough and complete disinfection of the entire farm and simplifies management, aiming to eliminate pathogens (bacteria, viruses, mycoplasma, etc.) and prevent the mutual transmission of diseases between new and existing flocks.
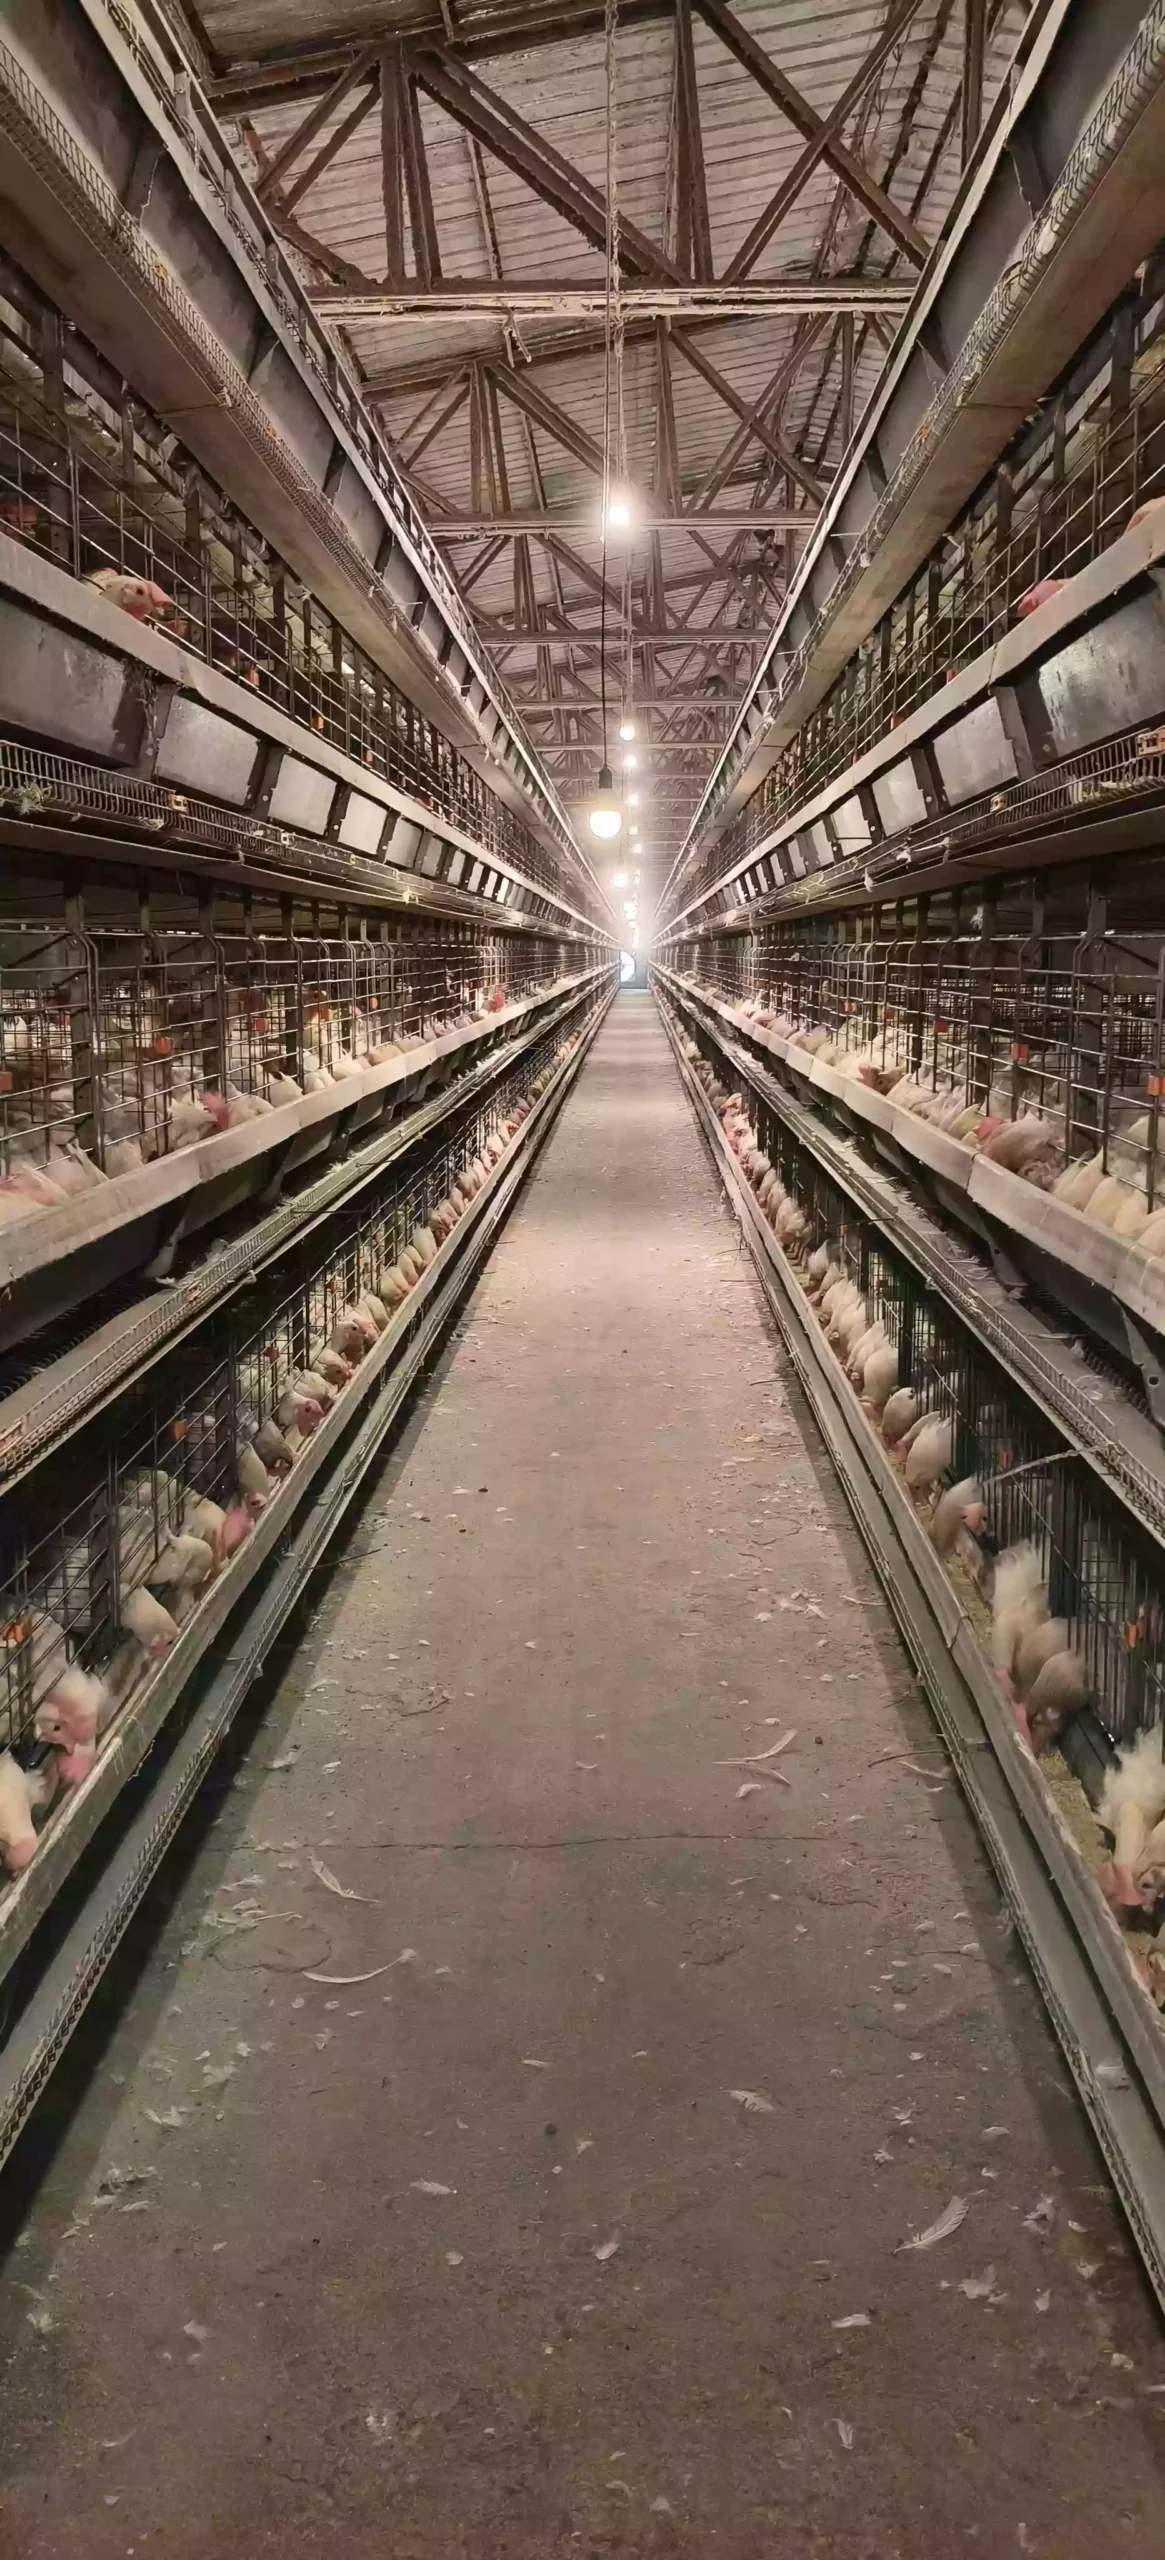
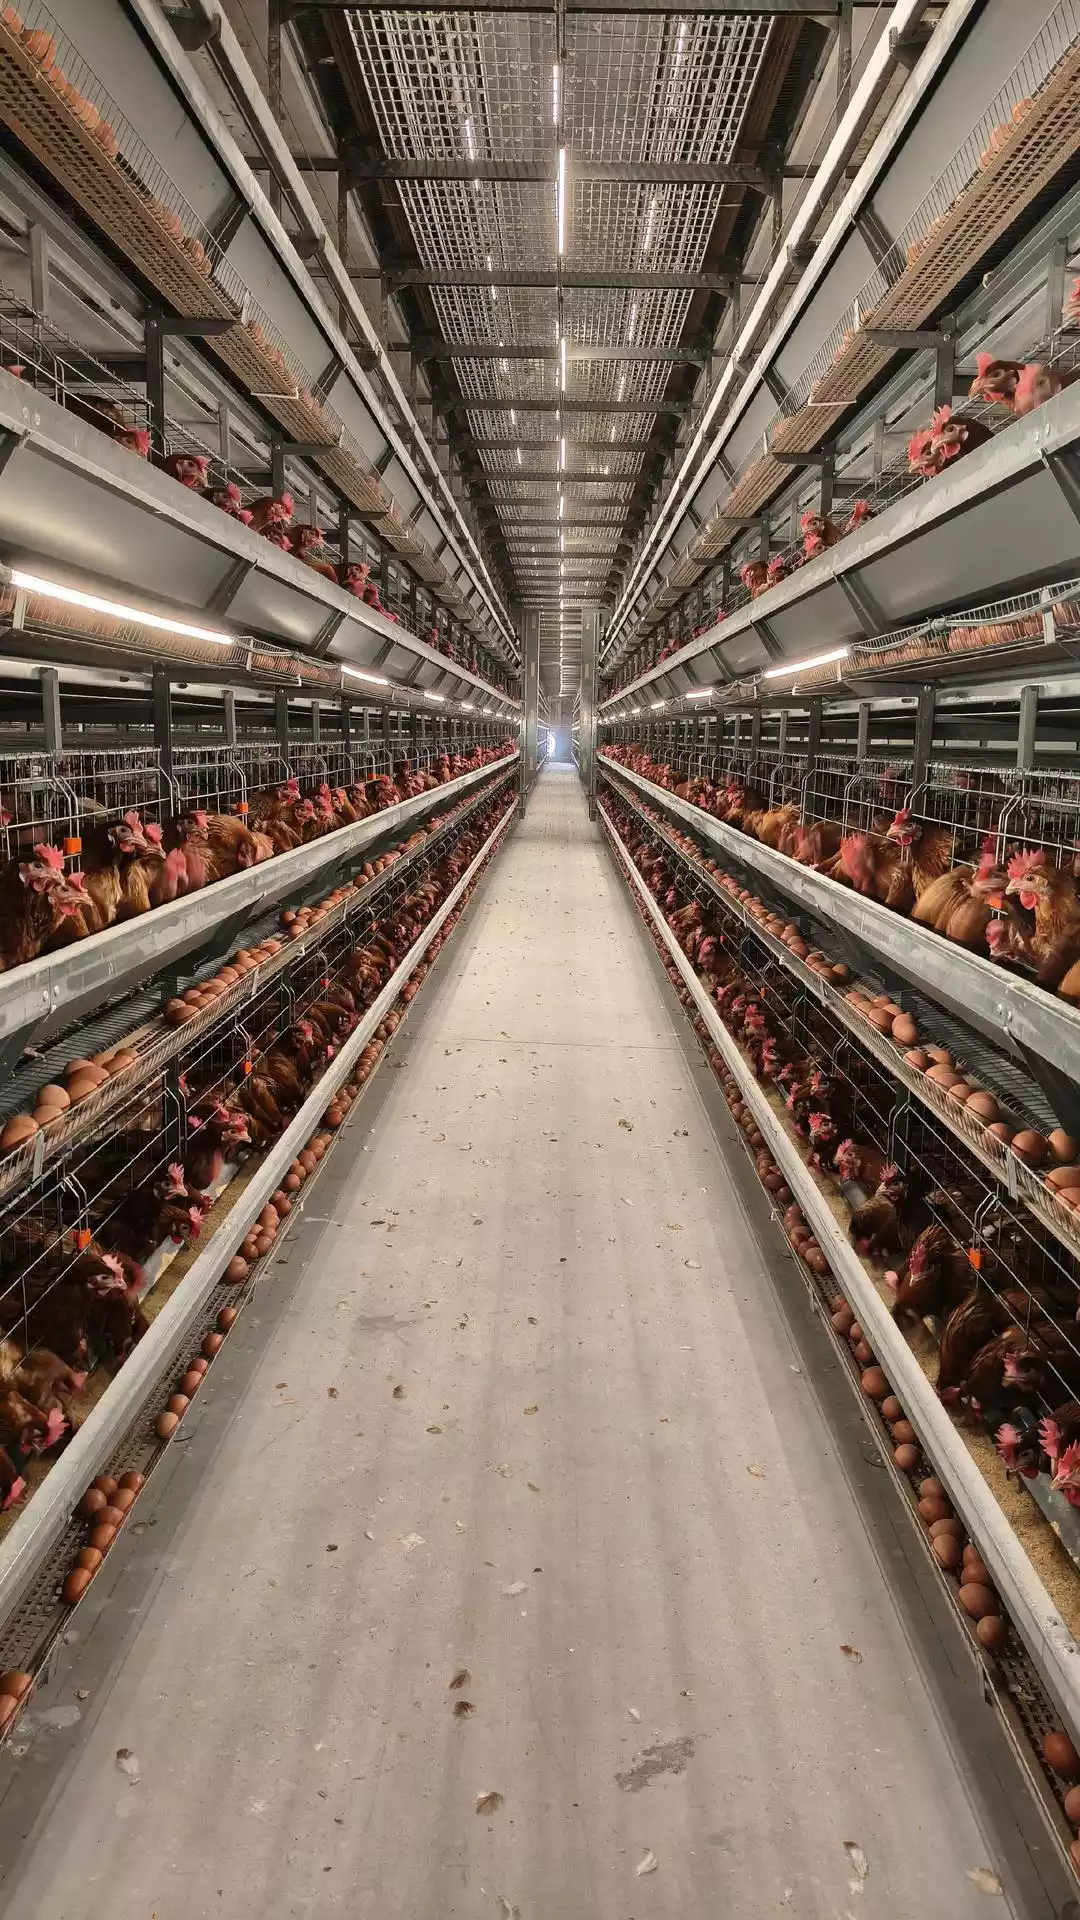
2. Deep Litter Floor Rearing and Raised Slatted Floor Rearing
There are various methods for rearing broilers, such as litter floor rearing, cage rearing, and raised wire floor rearing. We recommend raised slatted floor rearing or deep litter floor rearing. This involves either installing raised frames (slats) 50-60 cm above the cement floor inside the chicken house, with specialized netting laid on the frames, or spreading a 5-10 cm thick layer of litter on the floor. The broilers will feed, drink, and live on this surface throughout their growth period.
II. Chick Quality
1.
High-quality chicks originate from healthy breeder flocks. The breeder flock should be free from Pullorum, Fowl Typhoid, and Mycoplasma infection, and should have undergone scientific vaccination.
2.
Chicks should be uniform in size and color, with a body weight above 32 grams per chick. The chicks should be healthy and active.
III. Preparations Before Chick Arrival
1. Strict Cleaning and Disinfection of Chicken House and Equipment.
The disinfected chicken house should be left empty for one to two weeks to break the life cycle of pathogens. Specific procedures are as follows:
(1) After the birds are dispatched, remove all feed buckets (troughs), drinking utensils, and brooders, etc.
(2) Clean electrical equipment and then use non-corrosive disinfection methods. Soak feed buckets (troughs) and drinking utensils in disinfectant solution.
(3) If necessary, spray organophosphorus pesticides to kill mites, flies, etc., to prevent insect-vector diseases. Simultaneously, place rodenticide to eliminate rats.
(4) Remove litter, dust, and feces.
(5) Use high-pressure water to wash the chicken house floor, walls, and ceiling, etc.
(6) Disinfect with suitable disinfectants.
(7) After all equipment (including litter) is properly placed, fumigate the chicken house and equipment with potassium permanganate and formalin. Close doors and windows during fumigation. The fumigation dosage is 14 grams of potassium permanganate and 28 ml of formalin per cubic meter of space. Open doors and windows 48-72 hours before chick arrival to prevent harm to the chicks.
2.
Carefully check if all utensils and equipment are operating normally and performing well, including feeding and drinking utensils, brooders and other heating systems, electrical systems, ventilation systems, etc.
3.
24 hours before chick arrival, start the heating system to raise the temperature within the brooder to 32°C – 35°C.
The specific pre-warming time depends on the season and outdoor temperature. Check the thermometer to see if the temperature under the brooder is normal.
4.
Prepare water in the drinkers a few hours before the chicks arrive, allowing the water temperature to match the room temperature.
5.
The stocking density for chick floor rearing and raised slat rearing is 35 birds/m² for days 1-7; and 20 birds/m² for days 15-21.
IV. Chick Reception and Brooding Management
1. Chick Reception Time: Preferably during the cooler hours of early morning or evening in summer, and around noon in winter.
2. Chick Transport Vehicle: Clean and disinfect the vehicle before transport. Load boxes steadily and securely, avoid tilting, avoid overly dense or tight packing, leave ventilation passages. The vehicle should be covered with a tarpaulin, but the tarpaulin should not directly contact the chick boxes; leave a space of more than 30 cm to prevent suffocation. Do not stop during transport. Check and rearrange boxes every hour.
3. Upon arrival at the destination, release the chicks immediately. If vaccination is required before release, ensure that chick boxes are not stacked or placed near flues in the brooding room. Also, do not leave them placed for too long to avoid chick hypoxia and dehydration.
4. Chick Heating: Can use whole-house heating – heat the entire brooding room to the same temperature, about 29°C – 31°C, stocking 20-35 birds per square meter. The ideal heating method is using a comprehensive heating protective barrier arranged in a circle, eliminating corners. The barrier is generally 46 cm high, placed 0.92 – 1.22 m from the edge of the brooder. Use solid materials in winter, and ventilated protective netting in summer. Remember to gradually expand the protective device outward daily (increasing area by about 20-25%) until removal after 7-14 days. For brooding on raised slats, for the first 3-5 days, place a support material (e.g., woven cloth) on the slats, then spread litter on the support. Remove the support and litter after 5 days.
Ideal Brooding Temperature Reference Table (Measured 5cm above litter)
| Day-age | Temperature (°C) |
|---|---|
| 1-7 | 35 – 31 |
| 8-14 | 29.4 |
| 15-21 | 26.6 |
The ideal house temperature for growing birds is 18-23°C.
When the flock is stressed or reacting to vaccination, increase the brooder temperature by about 2.0°C above the normal requirement until the chicks return to normal health. Pay attention to the flock’s behavior, as thermometers may not always be accurate. Judge the suitability of the brooding temperature by the comfort of the chicks. Chicks staying away from the heat source and panting indicates excessive temperature; lower the temperature. Chicks huddling together indicates low temperature; increase the temperature. Huddling in a specific area indicates a draft. Pay high attention to these three aspects, otherwise, rearing performance will be affected.
5. After transferring chicks to the brooder, let them drink water first to create a drinking memory, effectively preventing dehydration. 2-3 hours later, when one-third of the chicks are searching for food, provide feed to facilitate rapid yolk sac absorption. In the first few hours, 2.5-5% glucose can be added to the water. If transport distance was long and stress is severe, add compound liquid vitamins (e.g., Nawei 1000) to the water for the first 3 days, along with appropriate antibiotics to prevent initial bacterial infections.
6. Maintain careful records. Examples: date and number of birds received, breed, daily mortality and culling numbers, vaccinations, medications, feed consumption, etc. This facilitates statistical analysis, accounting, summarizing experiences and lessons, and assists technical service personnel in checking, referencing, and providing suggestions to improve feeding management.
V. Daily Management
1. “All-in All-out System”: Most poultry diseases originate from infected poultry. The transmission of these diseases can be avoided by correct biosecurity and isolation methods.
2. Control of Visitors: Humans are the biggest vector of disease transmission. Therefore, visitors must be strictly prohibited from entering the chicken house. Workers within the farm should wear cleaned and disinfected shoes and work clothes. If staff need to manage more than one flock, they must follow the principle of attending to younger flocks before older flocks.
3. Avoid Misuse of Antibiotics and Antimicrobials: The use of drugs in poultry is very important for disease prevention and treatment. However, drugs are only a supplement to a health management plan and cannot replace proper management. Medication must follow veterinary advice.
4. Strict Disinfection: A disinfection footbath or a bucket filled with effective disinfectant solution and a brush should be placed at the entrance of each chicken house. This allows staff to clean their shoes every time they enter, preventing the introduction of diseases into the poultry farm (house).
5. Adequate Disinfection Downtime: Areas storing litter, other materials, and equipment should be as far away from the flocks as possible. Each chicken house must be cleaned and disinfected between flocks being sold and new chicks being introduced. It must then be left empty for at least one week after disinfection before new chicks arrive.
6. Farms (Houses) Should be Easy to Disinfect and Protect: Chicken houses should have cement floors. Doors and windows should be fitted with wire mesh to prevent the entry of wild birds and rodents, as they are major carriers of pathogens. Be aware of the presence of diseases and vectors, and eradicate and guard against them to avoid the flock being attacked by diseases.
7. Incorrect Management Leading to Broiler Downgrading:
- Blisters
- Incorrect nutrition
- Poor feathering
- Leg and breast muscle damage
- Bruises and broken bones
- Scratches
- Poor handling
- Incorrect house design
- Poor litter condition
- High temperature
- Leg problems
- Disease
- High stocking density
- Water management
- Ascites Syndrome (Note: “Oil Chicken Syndrome” in original text is likely a typo for Ascites)
- Culls
VI. Feeding Management
1. Use flat-bottomed square feed trays for chicks before 7 days of age, 1 tray per 100 chicks. Use round feed pans at 50 chicks per pan. Note: Insufficient feeder numbers or feeding space will severely affect flock uniformity. Adding feed should follow the principle of “little and often”.
2. When chicks reach 5 to 7 days of age, start introducing feed buckets or troughs. Some feed trays can be removed. As the birds grow, gradually raise the troughs or buckets so the edge height is level with the birds’ backs. This effectively reduces contamination.
3. Do not fill feed troughs beyond one-third capacity. Ensure birds have sufficient feeding space. Required trough feeder space: 2.5 cm per bird for days 1-14; 5 cm per bird for days 15-42; 7.6 cm per bird from day 43 to market. If using feed buckets, provide 25 buckets (with a capacity of 13-14 kg) per 1000 birds. Each filling should not exceed 2/3 of the bucket’s capacity to avoid feed becoming damp and moldy from staying in the house too long.
4. Within the first two weeks, chicks must be fed finely crumbled feed, such as “Vite” brand 510 Broiler Starter feed. Use pellets during the middle and late stages. Broilers prefer pellets and crumbles over mash. Feeding time is shortened by 60%-80% compared to mash feed.
5. Feed 3-4 times daily to stimulate the birds’ appetite and reduce feed waste.
6. Broiler feeds are divided into Broiler Starter 510, Broiler Grower 511, and Broiler Finisher 512 or 513. Use 510 from 1-21 days, 511 from 18-30 days, and 512 from 28 days to market, or use 513 for the 7 days before market. Feed changes should be gradual, typically completed over 3-4 days.
VII. Water Management
1. For every 1000 day-old chicks, there should be 20-25 drinkers (approx. 4 liters capacity) filled with fresh, clean water. Insufficient drinkers often lead to varying degrees of dehydration in chicks, resulting in “dry-footed chicks” which subsequently grow slowly and affect flock uniformity. Place drinkers near the heat source and alternate their placement with feeders.
2. Do not cut off the water supply. Drinking water must be clean and sanitary, free of pathogenic microorganisms. Drinkers should be cleaned and disinfected before filling.
3. When using automatic drinkers, gradually move the manual drinkers towards the automatic ones from 5-7 days of age. From 8-10 days of age, gradually remove a few drinkers daily so the chicks discover the new water source. If necessary, keep some drinkers until fourteen days, giving chicks ample time to fully adapt to the automatic drinkers.
4. If using water troughs, provide at least 2 cm of linear drinking space per bird (include both sides of the trough in the calculation).
5. Adjust the height of the drinkers appropriately as the birds grow. The edge of the drinker should be level with the height of the birds’ backs. This reduces water spillage, keeps the litter dry, and makes it easier for the birds to drink.
6. Place drinkers so that water is accessible within a 2.0 m range for the birds.
7. For every 1 kg of feed consumed, birds need to drink 2-3 liters of water. Water consumption increases with higher temperatures.
The table below shows the approximate daily water requirement per 1000 birds. For drinking water vaccination, the reference water volume is 1/5 of the daily water intake.
| Week | At 10°C | At 21°C | At 32°C |
|---|---|---|---|
| 1 | 23 L | 30 L | 38 L |
| 2 | 49 L | 60 L | 102 L |
| 3 | 61 L | 91 L | 208 L |
| 4 | 91 L | 121 L | 272 L |
| 5 | 113 L | 155 L | 333 L |
| 6 | 140 L | 185 L | 390 L |
| 7 | 174 L | 216 L | 428 L |
| 8 | 189 L | 235 L | 450 L |
8. Poultry Drinking Water Quality Standards
| Pollutant, Mineral, or Ion | Normal Level | Maximum Acceptable Level |
|---|---|---|
| Total Bacteria | 0 CFU/ml | 100 CFU/ml |
| E. Coli | 0 CFU/ml | 50 CFU/ml |
| Acidity pH | 6.8-7.8 | 6.0-8.0 (Note: Original says 6.8-8.0 for max, but 6.0 is common lower limit) |
| Hardness, Total | 60-180 ppm | 110 ppm (Note: Max level seems low, often higher levels are acceptable) |
| Calcium | 60 mg/L | |
| Chlorine | 14 mg/L (Note: Often refers to Chloride ion) | |
| Copper | 0.002 mg/L | 0.6 mg/L |
| Iron | 0.2 mg/L | 0.3 mg/L |
| Lead | 0 mg/L | 0.02 mg/L |
| Magnesium | 14 mg/L (Note: Often higher levels acceptable) | |
| Nitrates | 10 mg/L | 25 mg/L |
| Sulfur | 125 mg/L (Note: Often refers to Sulfate) | |
| Zinc | 1.5 mg/L | |
| Sodium | 32 mg/L | 50 mg/L |
The ideal water tank capacity on a farm should be based on the maximum 24-hour demand. In hot weather, water tanks should be shaded. Required water temperature in the tank:
| Water Temperature | |
|---|---|
| Below 5°C | Too cold, birds drink less |
| 10-14°C | Ideal water temperature |
| Over 30°C | Too warm, birds drink less |
| Above 44°C | Birds stop drinking |
VIII. Ventilation
1
Ventilation in the chicken house provides sufficient oxygen for the birds, removes harmful gases such as carbon monoxide, carbon dioxide, and ammonia, expels moisture from the house, controls humidity, regulates temperature, and helps control diseases.
2
Poor ventilation increases ammonia levels, which is very harmful to bird health. When ammonia concentration exceeds 20 ppm, it can damage the birds’ respiratory tracts, lower their resistance, providing a portal for pathogen invasion, easily leading to Newcastle disease, Chronic Respiratory Disease (CRD), airsacculitis, nephrotic infectious bronchitis, etc., resulting in increased mortality, growth suppression, and poorer feed conversion ratio. If ammonia concentration exceeds 50 ppm, it can cause blindness in birds (keratitis, conjunctivitis).
3
An experienced broiler farmer can detect the presence of ammonia before it reaches levels that affect bird performance. When you can smell a pungent ammonia odor, the concentration has already exceeded the standard. This should be resolved by improving ventilation. Ammonia begins to form when the moisture content in the litter exceeds 30%. The higher the temperature, the more rapidly ammonia is produced. However, when litter moisture is maintained between 21-25%, ammonia is generally not produced. Therefore, water spillage should be minimized, and ventilation ensured to keep the litter dry.
The general standard for measuring ammonia concentration in a broiler house is:
- 10 – 15 ppm: Ammonia smell can be detected;
- 25 – 35 ppm: Begins to irritate the eyes and cause runny noses;
- 50 ppm: Birds’ eyes tear up and become inflamed;
- 75 ppm: Birds shake their heads, showing extreme discomfort.
4
In houses with windows, avoid the occurrence of drafts.
5
The optimal air velocity at floor level inside the house depends on the temperature. For example, at a house temperature of 18.3°C – 21.1°C, air velocity should not exceed 9.14 m/min. Higher house temperatures require higher air velocities, and lower temperatures require the opposite.
6
When ventilating, consider the relationship between heat preservation and ventilation. Increase the house temperature during ventilation, and restore the pre-ventilation temperature afterwards. In winter, strengthening ventilation and managing the relationship between ventilation and heat preservation is a key measure to reduce respiratory diseases, E. coli infections, and ascites. Do not overly worry that ventilation will chill the broilers and neglect it. Conditions unfavorable for ventilation and air exchange in the chicken house should be changed (see Appendix 1 for details).
IX. Lighting
1
Currently, many broiler operations use a lighting schedule of 23 hours of light and 1 hour of darkness. The 1 hour of darkness allows the birds to adapt and become accustomed to a dark environment, preventing them from becoming nervous and crowding together, causing suffocation deaths, in case of a power outage. To prevent Sudden Death Syndrome (SDS) and late-stage ascites, feed restriction can be appropriately applied during the broiler chick stage, i.e., using around 18 hours of light to reduce feed intake.
2
Light Intensity: For days 1-15, the light intensity should be 40-60 watts per 20 square meters to help the chicks get off to a good start with eating. From the third week onwards, gradually replace 60-watt bulbs with 15-watt bulbs, so that by 21 days of age, the light intensity is 15 watts per 20 square meters. Note: Bulb height should be 1.6-1.8 meters, and ensure bulbs are clean.
3
After 3 weeks of age, bright light becomes harmful to the birds, hindering their growth. Excessive brightness can make the birds too active, leading to injuries and increased feed consumption, and in severe cases, cannibalism.
4
Frequently clean and replace damaged bulbs. Dirty and dusty bulbs can reduce light output by 60%-70%, increase electricity consumption, and pose a fire hazard.
5
Light should be evenly distributed throughout the house.
6
Lighting Programs:
Lighting programs are generally designed to change at predetermined dates and vary with target market weight. Preventing overly rapid growth between 7-21 days reduces mortality from ascites, sudden death, and leg problems. Lighting programs incorporating continuous darkness exceeding 6 hours help improve immune system development.
(A) Benefits of Lighting Programs:
(1) Dark periods are more natural for birds and reduce stress.
(2) Aid in the normal development of the skeleton, cardiovascular system, and immune system.
(3) Birds have higher levels of available phosphorus, crucial for skeletal development.
(4) Save energy during rest, thereby improving feed conversion ratio.
(5) Due to compensatory growth, growth rates equivalent to or better than those under continuous light can be achieved.
(B) Key points to consider when using lighting programs:
- Test different lighting programs before finalizing one.
- Provide 24 hours of light on the first day after placement to ensure adequate feed and water intake.
- On the second night, turn off the lights to establish the dark period timing. Once set, this should not be changed. If the dark period is consistent, birds will gradually adapt and feed and drink before the lights go out.
- Use only a single dark period within 24 hours.
- Begin increasing dark time when birds reach 150-160 grams.
- The dark period should be scheduled at night to ensure true darkness. Thoroughly checking the flock during the day is also feasible.
- The lighting program should be adjusted based on average body weight, or reference past experience.
- Dark periods should be increased gradually, not hour by hour.
- Shorten the dark period before catching to reduce stress.
- The focus of broiler lighting programs is to control body weight from 7-21 days and promote compensatory growth in the later stages.
- If flock expansion (deployment) occurs, implement a 6-hour dark period on the first night after expansion.
- During heat stress, feeding can be done at night, and the dark period may need to be shortened.
(C) Lighting Programs
For 55+ grams Average Daily Gain
| Day-age * | Body Weight (g) | Light (hours) | Dark (hours) | Intensity (lux) |
|---|---|---|---|---|
| 0 | 40 | 24 | 0 | 20-60 |
| 1 | 48 | 23 | 1 | 20-60 |
| 6-7 | 160 | Natural light + 2 | 5-10 | |
| Days before slaughter: | ||||
| 20-15 | Natural light + 4 | 5-10 | ||
| 15-12 | Natural light + 6 | 5-10 | ||
| 10-6 | 23 | 1 | 5-10 | |
| At market | 23 | 1 | 5-10 gradually to 10-20 |
For 50+/- grams Average Body Weight
| Day-age * | Body Weight (g) | Light (hours) | Dark (hours) | Intensity (lux) |
|---|---|---|---|---|
| 0 | 40 | 24 | 0 | 20-60 |
| 1 | 48 | 23 | 1 | 20-60 |
| 6-7 | 160 | Natural light + 4 | 5-10 | |
| Days before slaughter: | ||||
| 20-15 | Natural light + 6 | 5-10 | ||
| 15-12 | Natural light + 8 | 5-10 | ||
| 10-6 | 23 | 1 | 5-10 | |
| At market | 23 | 1 | 5-10 gradually to 10-20 |
Notes:
- Refers to the day-age when the light change occurs.
If flock expansion occurs, implement the lighting program for the entire flock. After expansion, convert the remaining flock to natural light plus 6 hours of light. 6-7 days before processing, the remaining flock can increase light to 23 hours, retaining a 1-hour dark period.
* Increase light intensity to 10-20 lux 24-28 hours before catching, to acclimatize the flock to the catching environment.
Depends on time and the farm’s latitude.
X. Litter and Slatted Floor Materials
1
The choice of litter type depends on its availability, good moisture absorption and breathability, and being non-harmful to the birds. Commonly used litter includes processed wood shavings, chopped rice straw, wheat straw, pine needles, corn stalks, etc. Whatever litter is used, it must be fresh. Avoid using stale or moldy litter to prevent the ingestion of molds which can cause chick pneumonia. Therefore, litter must be disinfected before being brought into the house.
2
The litter thickness should be 5-10 cm, spread evenly and generally consistent.
3
If using rice straw or wheat straw as litter, its length should not exceed 5 cm, and it should be mixed with 1/3 rice hulls.
4
Maintain litter moisture content between 20-25%. When moisture content is below 20%, dust from the litter becomes a serious problem. Dust flying in the chicken house can lead to respiratory diseases. When moisture content exceeds 30%, the litter becomes damp and prone to caking. A practical method to determine correct litter moisture is: it should feel slightly sticky when held in the hand, but break apart when dropped.
5
Frequently remove wet litter around drinkers and replenish with fresh, clean litter.
6
Regularly turn the litter with a rake to prevent caking and compaction. Caked, compacted litter easily produces toxic and harmful gases and should be removed.
7
Materials for slatted floors can be made of wooden strips or bamboo strips with gaps of about 2.5-3 cm. Each square meter should bear a load capacity of 60 kg. The slatted floor height should be 60-70 cm, with walkways for the stockperson to facilitate manure removal.
8
Specialized plastic netting for poultry should be laid on the slatted frames. Use small mesh netting for chicks and larger mesh netting for growing and finishing birds.
XI. Vaccination
1
Vaccination programs should be formulated according to the needs of different regions or individual farms. Due to varying maternal antibody levels in chicks and differing disease prevalence in areas or farms, the types and timing of vaccines used will differ. Therefore, poultry owners should frequently contact technical staff from the animal health center to obtain appropriate recommended vaccination programs. It is also advised to purchase vaccines from the Chengdu Chia Tai Animal Health Center.
2
Follow the manufacturer’s instructions for storing and using vaccines. Record the vaccination date, vaccine type, administration method, expiration date, manufacturer, batch number, etc., for each vaccination.
3
When administering vaccines via drinking water, the following principles should be observed:
(1) In hot weather, withhold water for 1 hour before vaccination; under normal conditions, withhold water for 2 hours.
(2) Thoroughly clean the water system and utensils. But do not use disinfectants.
(3) Provide clean water free of disinfectants to the birds. Add skimmed milk powder to the water at a concentration of 0.3% – 0.5%.
(4) Prepare the vaccine-water mixture in a clean container, such as a bucket, then pour it into the already cleaned water troughs or drinkers. Do not rely on automatic drinkers for administration.
(5) The water containing the vaccine should be consumed within 20-30 minutes.
The reference water volume for 1000 doses of vaccine is:
| Vaccine Dosage | 4 days – 2 weeks | 2 – 4 weeks | 4 – 8 weeks |
|---|---|---|---|
| 1000 doses | 10 kg | 15 kg | 20 kg |
Water volume can be appropriately increased in hot weather.
(6) Ensure sufficient drinking space so that all birds can drink the vaccine-water simultaneously. Increase the number of drinkers if necessary.
(7) Gently disturb the flock to ensure all birds drink the water, preventing thirsty birds from over-drinking while others drink insufficiently.
(8) After the vaccine-water is consumed, continue providing clean water (without disinfectants).
4. Vaccination is an inevitable stressor for broilers. Therefore, implement good management to help alleviate stress. If vaccinating during the brooding period, slightly increase the brooder temperature by about 2.0°C until the flock returns to normal health.
XII. Handling of Sick and Dead Birds
1
Dead birds and culled sick birds are sources of disease transmission. They should be removed and properly disposed of daily. Never leave dead birds inside the pen, feed room, or around the chicken house. Do not use dead birds to feed pigs, dogs, or cats.(Do not discard them in fields, ditches, or nearby woods).
2
Common disposal methods are incineration and deep burial.
3
Incineration Method:
Build 1-2 incinerators according to the farm’s stocking capacity. Although more expensive, this is a worthwhile choice, especially for farms with drainage issues or potential water source contamination. The incineration site should be located downwind of the chicken houses and living quarters. Ensure all dead birds are burned into white ash.
4
Deep Burial Method:
Design two burial pits with sufficient volume and tight-sealing lids. Place dead birds inside. A farm with 10,000 broilers needs two burial pits with a net volume of 1.00 meter diameter × 1.80 meters deep. The pit bottom and walls should be cement-lined. Disinfectants must be used inside the pits in use, and the two pits should be used alternately. The capacity should not exceed 2/3. After the bird carcasses in the pit have fully decomposed, clean out the pit and dispose of the contents properly.
5
For sick or dead birds that need to be sent for examination, they should be properly packaged before being sent to the disease diagnostic center.
XIII. Proper Record Keeping
Proper records clarify the profit and loss of each batch, provide reference materials for improvement, and facilitate the establishment of effective files by company technical service personnel, genuinely helping farmers improve efficiency and reduce costs. Therefore, the manager of each farm must truthfully record relevant information for each flock. Content that needs to be recorded includes:
- Chick Arrival Record: Date, number of chicks received, source of chicks, means of chick transport, weather conditions at the time, house number, etc.
- Daily Records: Mortality, culls, feed consumption, flock condition, weather, medication, vaccinations, etc.
- Weekly Records: Weekly total feed consumption, mortality, and culls. It is best to sample and weigh birds at the weekend as a reference for growth and development, facilitating analysis of potential hidden diseases.
- Vaccination and Medication Records: Date, vaccine name/type, drug name, manufacturer, expiration date, dosage and method of administration, reaction/effect, etc.
- Sales Record: Date, number of birds, weight, unit price, total price.
- Rearing Performance:
- Rearing Rate (%) = Number Sold / Number of Chicks Received × 100%
- Feed Conversion Ratio (FCR) = Total Feed Consumed / Total Live Weight Sold
- Average Sale Weight = Total Sale Weight / Number of Birds Sold
- Cost and Profit Calculation:
- Income: Broilers, chicken manure, feed bags, chick boxes.
- Expenditure: Feed, chicks, labor, heating, water/electricity, capital interest, equipment depreciation, miscellaneous expenses, etc.
- Profit/Loss = Income – Expenditure.
XIV. Appendices
Appendix 1. Broiler Rearing Record Sheet
| Weekly Data | Bird Weight (kg) | ||||||||||
|---|---|---|---|---|---|---|---|---|---|---|---|
| Week | Date | Day Age | Mortality | Culls | Actual Stock | Feed (kg) | Accumulated Feed | Remarks | Frame 1 | Frame 2 | Frame 3 |
| 1 | |||||||||||
| Subtotal | |||||||||||
| 2 | |||||||||||
| Subtotal | |||||||||||
| 3 | |||||||||||
| Subtotal |
(Table continues for Weeks 4-10 as per original layout)
Appendix 2. Commercial Broiler Performance
(Mixed Sex Rearing)
| Week | Body Weight (g) | Feed Conversion Rate (FCR) |
|---|---|---|
| 1 | 177 | 0.856 |
| 2 | 486 | 1.059 |
| 3 | 930 | 1.261 |
| 4 | 1466 | 1.446 |
| 5 | 2050 | 1.611 |
| 6 | 2633 | 1.760 |
| 7 | 3177 | 1.902 |
Appendix 3. Broiler Vaccination Plan and Report
| Scheduled Vaccination | Actual Vaccination | Responsible Person | Disease | Vaccine Type | Method | Manufacturer | Vaccine Batch No. | Expiry Date | Unit | Dosage | Cost | Remarks | |
|---|---|---|---|---|---|---|---|---|---|---|---|---|---|
| Date | Day-age | Date | – | – | – | – | – | – | – | – | – | – | – |
| Total |
Appendix 4. Broiler Medication Record Report
| Date | Medication Name | Active Ingredient | Manufacturer | Administration Method | Diagnosed Disease | Efficacy | Unit | Dosage | Cost | Comments | ||||
|---|---|---|---|---|---|---|---|---|---|---|---|---|---|---|
| Start | End | Day Age | Yes | No | ||||||||||
| ☐ | ☐ | |||||||||||||
| ☐ | ☐ | |||||||||||||
| ☐ | ☐ | |||||||||||||
| ☐ | ☐ | |||||||||||||
| Total |
Appendix 5. Broiler Vaccination Program I
| Vaccination Day-age | Vaccine Type | Administration Method |
|---|---|---|
| 1 | Infectious Bronchitis (Ma5) | Eye drop or nasal drop |
| 7-10 | Newcastle Disease (e.g., N79, Clone30) | Eye drop or nasal drop |
| 14-18 | Gumboro (Infectious Bursal Disease) (e.g., Bursine) | Oral drop or drinking water |
| 20-22 | Newcastle Disease (Clone30) or ND+IB (Ma5+Clone30) | Eye drop/nasal drop or drinking water |
| *25-28 | Gumboro (IBD) (e.g., Bursine) | Oral drop or drinking water |
Broiler Vaccination Program II
| Vaccination Day-age | Vaccine Type | Administration Method |
|---|---|---|
| 1 | Newcastle Disease (e.g., N79) | Eye drop, nasal drop, or spray |
| Infectious Bronchitis (H120) | Eye drop, nasal drop, or spray | |
| Newcastle Disease (Killed Vaccine) | Subcutaneous injection (neck) | |
| 14 | Gumboro (IBD) (e.g., Bursine) | Oral drop or drinking water |
| *21-24 | Newcastle Disease (Clone30) | Eye drop or nasal drop |
Note: * indicates customers can choose to use based on local prevalence and farm situation.
Vaccination Program for Pullets (Partial Rearing)
| Day-age | Vaccine Type | Administration Method |
|---|---|---|
| 1 | Infectious Bronchitis (H120 or Ma5) | Eye drop or nasal drop |
| 8 | Newcastle Disease (e.g., N79, Clone30) | Eye drop or nasal drop |
| 14 | Gumboro (IBD) (e.g., IBD228E) | Oral drop or drinking water |
XV. Farm Disinfection Procedures
Disinfection Procedures for Different Growth Stages
1. Disinfection of Empty Poultry Houses:
(1) Disinfection Process:
Remove dust, feces, and handle litter -> Wash house and equipment -> Dry -> Seal house -> Fumigate -> Ventilate for 1 week -> Chick arrival -> Raise house temperature -> Spray disinfectant 24 hours before chick arrival.
(2) Detailed Plan:
- Litter Handling: Remove and discard litter.
- Washing: Use a high-pressure washer to wash the ceiling, walls, windowsills, and equipment from top to bottom.
- Spray Disinfection (e.g., with Quat-based disinfectant): After drying, spray the house from top to bottom using a agricultural sprayer to wet all surfaces.
- Disinfectant Spray (e.g., Peroxyacetic Acid or Caustic Soda): Use 0.5%-1% Peroxyacetic Acid or 3%-5% Caustic Soda for open areas. Use less corrosive disinfectants (e.g., Quats) for equipment areas.
- Fumigation: Seal the house. Fumigate with 42 ml Formalin (Formaldehyde) + 21 g Potassium Permanganate per cubic meter of space for 24 hours.
- Ventilation: After 24-36 hours of fumigation, ventilate thoroughly for 1 week.
Special Note: Avoid exposure to formaldehyde gas. Ensure thorough ventilation. - Empty Period: After ventilation, leave empty: Broiler houses – 1 week; Layer/Pullet houses – 2 weeks; Breeder houses – 1 month or more.
- Final Disinfection: 24 hours before chick arrival, spray disinfectant throughout the house environment.
2. Disinfection During Brooding Period:
Carry out 1-2 aerial/spray disinfection sessions per week using low-irritant disinfectants. During disease threats, disinfect at least once daily. Avoid disinfecting water during medication/vaccination. Disinfect items, equipment, and personnel routinely.
3. Disinfection During Growing/Finishing Period (Broilers) or Rearing Period (Layers/Breeders):
Carry out 2-3 aerial/spray disinfection sessions per week. During disease threats, disinfect at least once daily using effective disinfectants. Perform water disinfection daily, except during medication/vaccination.
4. Disinfection During Lay Period:
Routine disinfection is similar to brooding/rearing periods. In hot seasons, use cool water for daily aerial/spray disinfection to reduce heat stress.
5. Disinfection During Incubation:
(1) Incubator Room Item Disinfection: Use routine methods.
(2) Hatching Egg Disinfection: Fumigate eggs in a fumigation chamber with 2x standard dose of Formalin & KMnO4 for 20 minutes before setting; fumigate again 30 minutes before incubation starts (2x dose, 20 min); fumigate after candling (1x dose, 10 min); fumigate after transfer (same as post-candling).
(3) Incubator Cleaning/Disinfection: Drain, clean, wipe, rinse, disinfect surfaces, rinse, add disinfectant to water pans, fumigate with 3x standard dose of Formalin & KMnO4 for 30 minutes.
Note: Standard Fumigation Dose (1x): 7 g KMnO4 + 14 ml Formalin per cubic meter